Kasias Pierogi Cooking Instructions: A Comprehensive Guide
Kasias Pierogi offers a delightful, authentic Polish experience, easily enjoyed thanks to convenient packages available at Costco, boasting fresh potatoes and simple preparation!
Kasias Pierogi have rapidly gained popularity, especially with the convenience of Costco’s three-pack offering (14-ounce packages for $12.47 as of December 4, 2025). These aren’t just any frozen dumplings; they represent a commitment to authentic Polish recipes, centered around creamy mashed potatoes and flavorful fried onions, all encased in a tender dough.
What sets Kasias apart is their dedication to quality and dietary needs. They are crafted in facilities free from corn and nuts, are rBST-free, contain zero trans fats, and boast a simple, wholesome ingredient list. Whether you’re a seasoned pierogi enthusiast or a curious newcomer, this guide will walk you through everything you need to know to enjoy perfectly cooked Kasias Pierogi, from thawing to serving!
What are Kasias Pierogi?
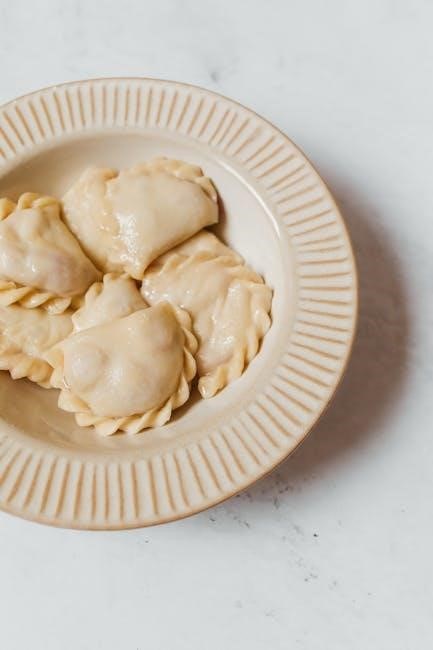
Kasias Pierogi are a traditional Polish dumpling, a culinary staple enjoyed for generations. They consist of unleavened dough traditionally formed by hand, then filled with savory or sweet fillings. The potato and cheese variety, a customer favorite, features a creamy mashed potato and fried onion blend encased in a delicate, tender wrapper.
Kasias distinguishes itself by prioritizing fresh ingredients and catering to specific dietary requirements. Their pierogi are produced in facilities that are both corn and nut-free, ensuring accessibility for a wider range of consumers. They are also rBST-free and contain zero trans fats, aligning with a commitment to wholesome, quality food. Essentially, Kasias Pierogi deliver an authentic Polish experience with modern convenience.
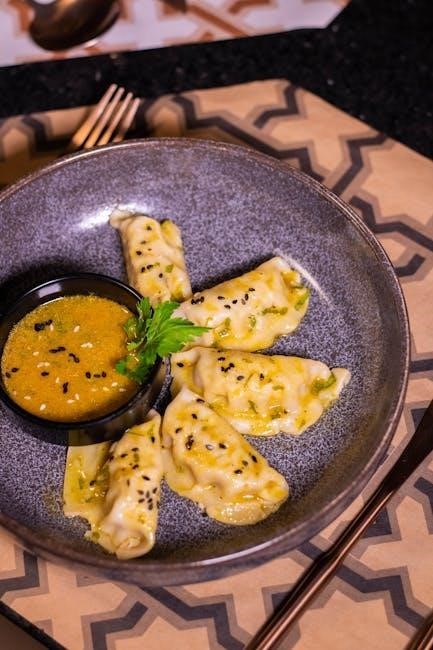
Kasias Pierogi: Potato and Cheese Variety
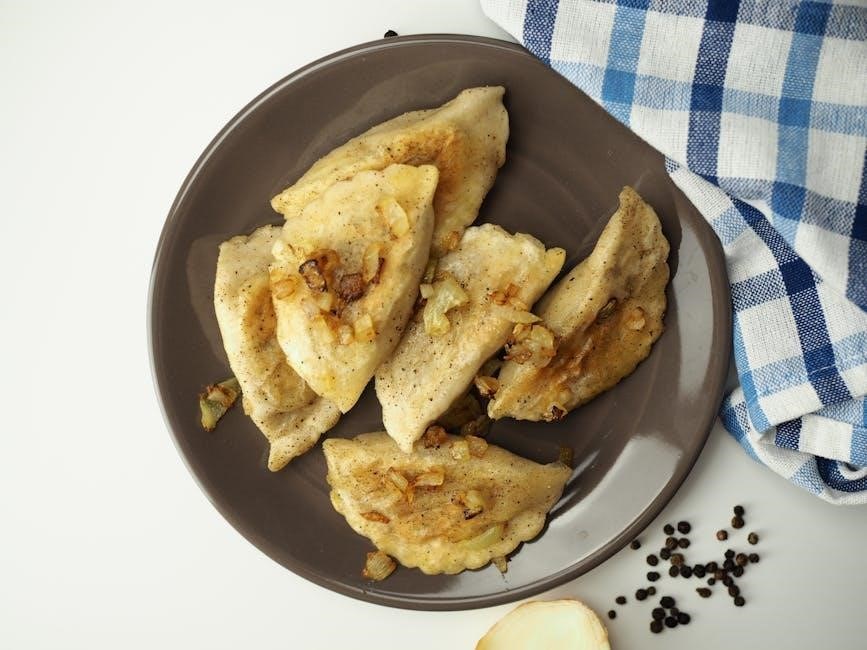
The Kasias Potato & Cheese Pierogi represent a classic Polish comfort food, expertly crafted for a satisfying meal. These pierogi feature a generous filling of creamy mashed potatoes perfectly complemented by flavorful, sautéed onions. This combination creates a rich and savory experience that appeals to a broad palate.
Available in convenient three-pack packages (14-ounce each) at Costco for $12.47 as of December 2025, they offer excellent value. Their ease of preparation – simply boil or pan-fry – makes them ideal for busy weeknights. Kasias prioritizes quality, using fresh potatoes and maintaining strict allergen controls, ensuring a delicious and worry-free dining experience.
Where to Buy Kasias Pierogi
Currently, the most readily accessible location to purchase Kasias Pierogi is at Costco warehouses. As of December 4th, 2025, and continuing into January 2026, Costco offers a convenient three-pack of 14-ounce packages of the Potato & Cheese variety for $12.47. This represents a significant value for those looking to enjoy this authentic Polish cuisine.
While Costco remains the primary retailer, availability may vary depending on location and stock. Checking your local Costco’s inventory online or by phone is recommended. Keep an eye out for potential expansion into other grocery chains in the future, as the popularity of Kasias Pierogi continues to grow.
Preparing Kasias Pierogi for Cooking
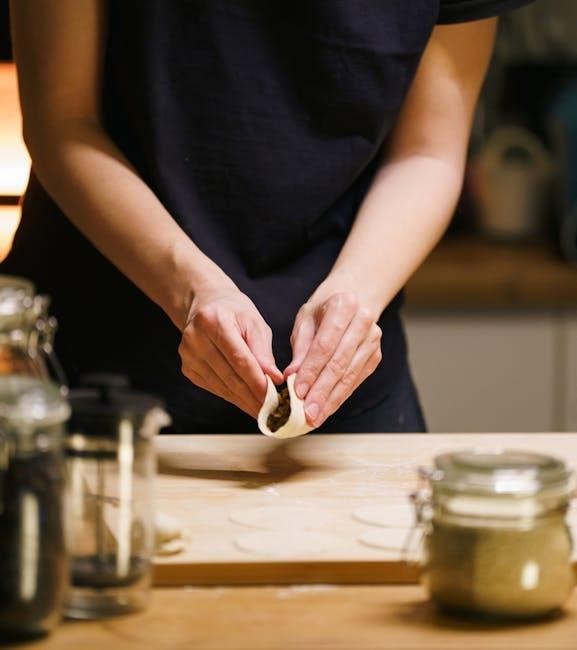
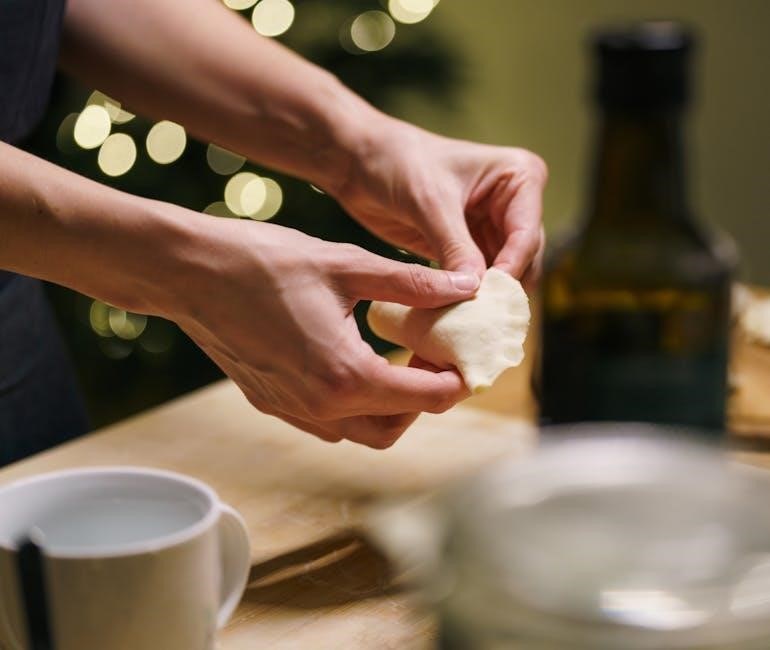
Kasias Pierogi are incredibly user-friendly, designed for quick and easy meal preparation. The packages allow you to “pop the pierogi right out,” minimizing prep time. However, proper preparation ensures the best possible texture and flavor. Before cooking, briefly inspect the pierogi for any damage or sticking – though they are typically well-separated.
Crucially, determine if your pierogi are frozen. If so, thawing is necessary (see dedicated instructions). For optimal results, avoid overcrowding during cooking, whether boiling or pan-frying. A little attention to detail at this stage will elevate your Kasias Pierogi experience significantly!
Checking the Ingredients
Kasias Pierogi are crafted with quality in mind, catering to various dietary needs. They are made in facilities free from corn and nuts, and contain zero trans fat, and are rBST free. However, it’s always prudent to quickly review the packaging for the most up-to-date ingredient list, especially if you have specific allergies or sensitivities.
While generally well-tolerated, confirming the ingredients ensures a safe and enjoyable meal. The potato and cheese variety prominently features, well, potatoes and cheese! A quick glance confirms the absence of artificial colors or preservatives, aligning with a commitment to fresh, wholesome ingredients.
Thawing Instructions (If Frozen)
Kasias Pierogi are often purchased frozen for extended freshness, but thawing isn’t strictly necessary for cooking. In fact, they can be added directly to boiling water from a frozen state! However, if you prefer to thaw them beforehand, it’s a simple process.
The recommended method is to transfer the desired amount of pierogi to the refrigerator and allow them to thaw for several hours, ideally overnight. Avoid thawing at room temperature for food safety reasons. Alternatively, for quicker thawing, place the sealed package in a bowl of cold water, changing the water every 30 minutes.
Boiling Kasias Pierogi
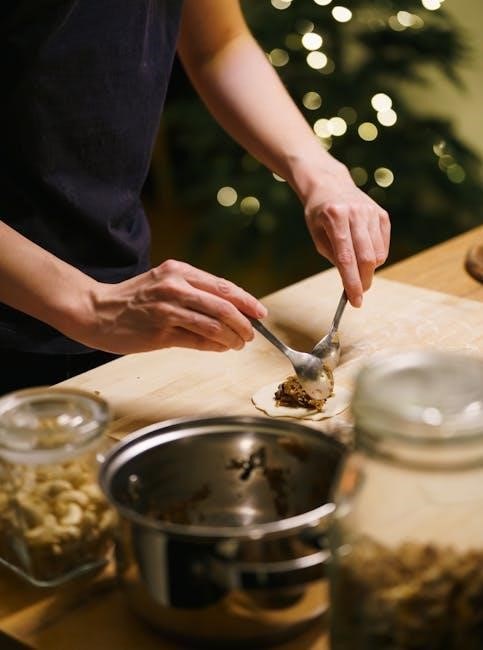
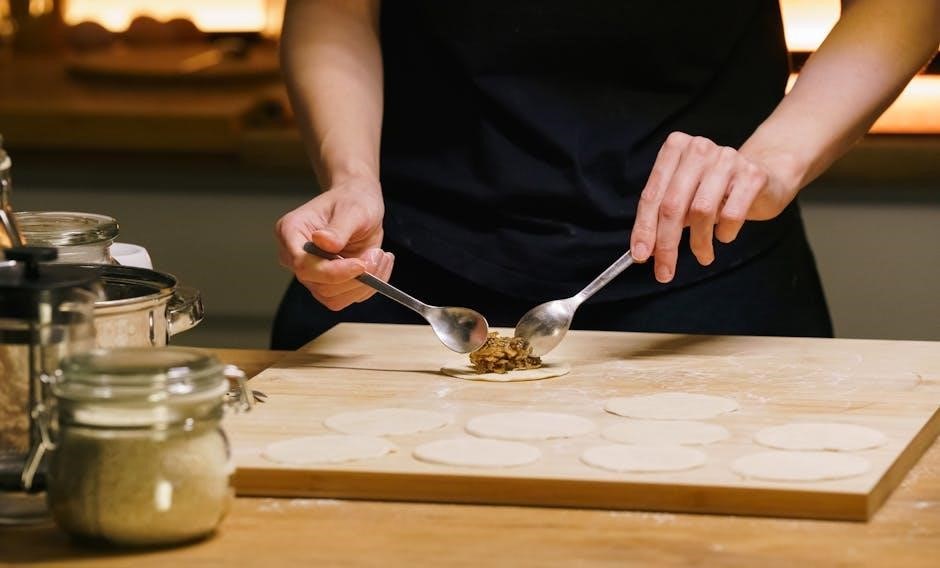
Boiling is the most traditional and straightforward method for cooking Kasias Pierogi. Begin by bringing a large pot of water to a rolling boil. Adding a pinch of salt to the water enhances the flavor of the pierogi. Once boiling, gently add the pierogi – whether thawed or frozen – to the pot, being careful not to overcrowd it.
Cook the pierogi in batches, approximately 2-3 minutes per batch, until they float to the surface and appear plump. Once they float, continue cooking for another minute to ensure they are heated through. Remove them carefully with a slotted spoon and proceed to pan-frying or serve immediately!
Water Preparation
Proper water preparation is crucial for perfectly cooked Kasias Pierogi. Start with a large pot – at least 6 quarts – and fill it with plenty of water; this prevents sticking and ensures even cooking. Add a generous pinch of salt to the water; approximately 1-2 teaspoons per gallon is ideal, enhancing the pierogi’s flavor from the inside out.
Bring the water to a vigorous, rolling boil before adding the pierogi. A strong boil is essential to prevent them from sticking together and to cook them quickly and evenly; Avoid adding oil to the water, as it can coat the pierogi and hinder sauce adhesion later.
Boiling Time and Technique
Boiling Kasias Pierogi is straightforward, but timing is key. Once the water reaches a rolling boil, gently add the pierogi in a single layer, avoiding overcrowding the pot. Cook in batches if necessary to maintain water temperature. Typically, pierogi require only 2-3 minutes of boiling time after they float to the surface.
Stir gently during the first minute to prevent sticking. Once floating, continue boiling for the remaining time. To test for doneness, remove a pierogi and cut it open; the filling should be heated through. Avoid overcooking, as this can lead to a mushy texture.
Avoiding Pierogi Sticking
Preventing Kasias Pierogi from sticking during boiling is crucial for a pleasant cooking experience. Begin with a generous amount of water in your pot – this provides ample space and dilution. Adding a tablespoon of oil to the boiling water can create a slick surface, reducing adhesion;
Gentle stirring during the initial minute of cooking is vital; this separates the pierogi and prevents them from settling and bonding to the pot’s bottom. Using a non-stick pot is also highly recommended. Avoid overcrowding the pot, as this increases the likelihood of sticking. Careful attention ensures perfectly cooked, non-clumped pierogi!
Pan-Frying Kasias Pierogi
Pan-frying Kasias Pierogi elevates their flavor and texture to a new level of deliciousness. Begin by ensuring the boiled pierogi are slightly dried before adding them to the pan. This promotes better browning and prevents steaming.
Choosing the right pan is key – a non-stick skillet is ideal. Heat butter or oil over medium-high heat, ensuring it’s evenly coated. Arrange the pierogi in a single layer, avoiding overcrowding. Fry for several minutes per side, until a beautiful golden-brown crust develops. This process creates a delightful crispy exterior complementing the soft interior.
Choosing the Right Pan
Selecting the appropriate pan is crucial for successfully pan-frying Kasias Pierogi and achieving that desirable golden-brown crust. A non-stick skillet is highly recommended, as it prevents the pierogi from adhering to the surface, ensuring even cooking and easy flipping.
Cast iron skillets can also be used, but require more oil to prevent sticking. Avoid using pans that are too thin, as they may result in uneven heat distribution. The pan should be large enough to accommodate a single layer of pierogi, preventing overcrowding which can lead to steaming instead of frying.
Frying with Butter or Oil
When pan-frying Kasias Pierogi, the choice between butter and oil – or a combination of both – significantly impacts the flavor and texture. Butter imparts a rich, golden color and delicious taste, but has a lower smoke point, requiring medium heat. Oil, particularly vegetable or canola, can withstand higher temperatures, promoting a crispier exterior;
Many cooks prefer a blend: starting with a tablespoon of oil to raise the heat threshold, then adding a knob of butter towards the end for enhanced flavor. Ensure the pan is adequately coated to prevent sticking, and avoid overcrowding to maintain consistent frying.
Achieving a Golden-Brown Crust
To achieve that perfect golden-brown crust on your Kasias Pierogi, maintaining the correct pan temperature is crucial. Medium-high heat is generally ideal, allowing for browning without burning. Avoid the temptation to constantly move the pierogi; allow them to sit undisturbed for 2-3 minutes per side to develop a proper sear.
Listen for a gentle sizzle – a vigorous bubbling indicates the pan is too hot. A light pressing with a spatula can help ensure even contact with the pan’s surface. Patience is key; resist flipping prematurely, as this can hinder the development of a beautiful, crispy exterior.
Serving Suggestions for Kasias Pierogi
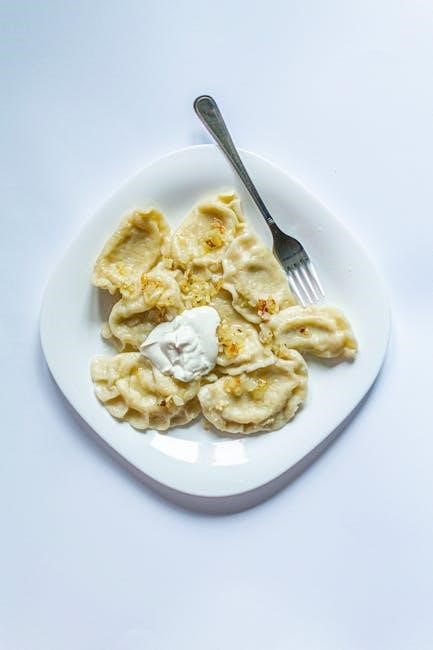
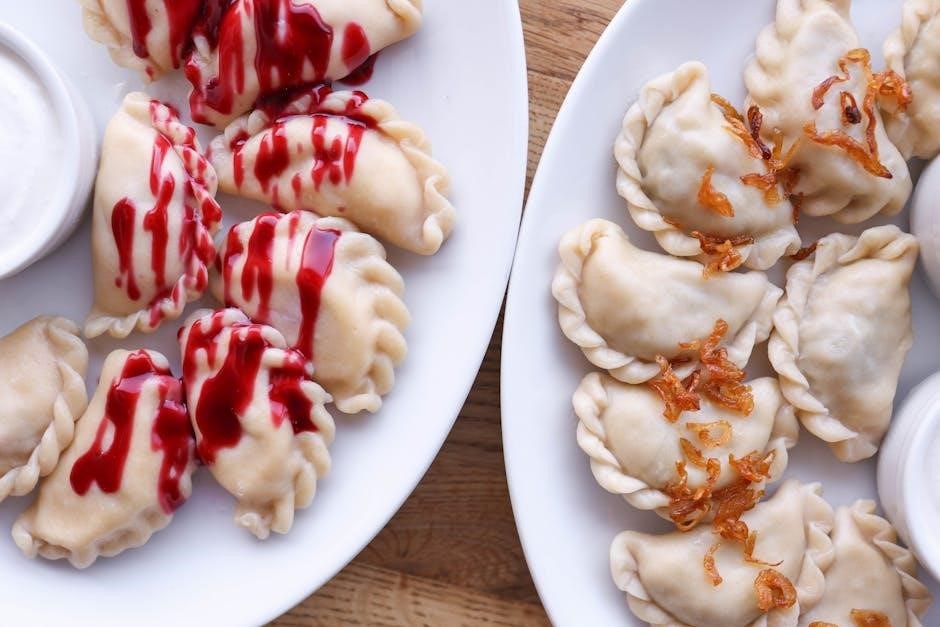
Kasias Pierogi are incredibly versatile! For a truly traditional Polish experience, serve them with a generous dollop of sour cream – a classic pairing that complements the creamy potato and cheese filling beautifully. Fried onions are another essential topping, adding a savory sweetness that elevates the flavor profile.
Beyond tradition, consider complementary side dishes like a crisp green salad with a vinaigrette dressing, or sautéed vegetables such as mushrooms or cabbage. A side of kielbasa (Polish sausage) also makes a hearty and satisfying accompaniment. Don’t be afraid to experiment and find your perfect pairing!
Traditional Polish Toppings
Kasias Pierogi, rooted in Polish culinary tradition, are best enjoyed with classic toppings that enhance their comforting flavors. Sour cream, or śmietana, is arguably the most iconic accompaniment, providing a cool, tangy contrast to the warm, savory pierogi. Crispy, caramelized onions, often fried in butter, are another staple, adding a delightful sweetness and textural element.
For a more robust flavor, consider adding crumbled bacon or skwarki (rendered pork fat with cracklings). A sprinkle of fresh dill or chopped parsley brightens the dish and adds a touch of freshness. These simple yet impactful toppings truly capture the essence of Polish cuisine and elevate the Kasias Pierogi experience.
Complementary Side Dishes
Kasias Pierogi, while satisfying on their own, pair beautifully with a variety of side dishes to create a complete and balanced meal. A crisp, refreshing salad, such as a simple cucumber salad with vinegar and dill, provides a lovely counterpoint to the richness of the pierogi. Sauerkraut, or kapusta kiszona, offers a tangy and fermented flavor that complements the potato and cheese filling.
For a heartier meal, consider serving Kasias Pierogi alongside Polish sausage, or kiełbasa, and a side of steamed or roasted vegetables like green beans or cabbage. A dollop of applesauce can also provide a sweet and savory contrast. These sides enhance the overall dining experience, showcasing the versatility of this beloved Polish dish.
Storage and Reheating
Kasias Pierogi are best enjoyed fresh, but proper storage ensures quality if you have leftovers. Uncooked pierogi should remain frozen until ready to use. Cooked pierogi can be refrigerated for up to three days in an airtight container. To reheat boiled pierogi, gently simmer them in water for a few minutes until warmed through – avoid overcooking to prevent them from becoming mushy.
For reheated fried pierogi, a quick pan-fry in butter or oil restores their crispy texture. Reheating in a skillet over medium heat for a few minutes on each side is ideal. Avoid microwaving, as it can compromise the texture. Proper storage and reheating methods maintain the delicious flavor of Kasias Pierogi.
Proper Storage Methods
Maintaining the quality of Kasias Pierogi relies on correct storage techniques. For uncooked pierogi, ensure they remain consistently frozen. Original packaging is suitable, but transferring to an airtight freezer bag provides extra protection against freezer burn. Cooked pierogi require refrigeration; place them in an airtight container within two hours of cooking to prevent bacterial growth.
Properly stored, refrigerated cooked pierogi are best consumed within three days. Labeling the container with the date of cooking is helpful. Avoid refreezing previously frozen and thawed pierogi, as this degrades the texture. Following these guidelines preserves the delicious taste and texture of your Kasias Pierogi.
Reheating Boiled Pierogi
Reheating previously boiled Kasias Pierogi is straightforward. The simplest method involves gently simmering them in water for a short duration – approximately 2-3 minutes per package. Avoid overcrowding the pot to ensure even heating. Alternatively, pan-frying offers a delightful textural contrast.
To pan-fry, melt a tablespoon of butter (or use oil) in a non-stick skillet over medium-high heat. Add the boiled pierogi and cook until golden brown and slightly crispy, flipping halfway through. This method revitalizes their flavor and adds a satisfying crunch. Remember to not overcook, as they are already cooked through!
Reheating Fried Pierogi
Reheating already fried Kasias Pierogi is best achieved to maintain their crispy texture. The oven or a skillet are excellent choices. For the oven, preheat to 350°F (175°C) and bake for 5-7 minutes, flipping halfway through, to restore some crispness.
However, a skillet provides superior results. Heat a small amount of butter or oil over medium heat. Add the pierogi and cook for 2-3 minutes per side, until heated through and delightfully crispy again. Avoid overcrowding the pan. This method quickly revives the golden-brown crust and ensures a satisfyingly crunchy bite. Enjoy immediately for optimal texture!
Nutritional Information (Kasias Potato & Cheese)
Detailed nutritional information for Kasias Potato & Cheese Pierogi can vary slightly depending on preparation methods. However, a typical serving (approximately 3 pierogi – 122g) contains around 230 calories. This includes roughly 8g of fat, 32g of carbohydrates, and 6g of protein.
These pierogi are also cholesterol-free and contain zero trans fats, making them a relatively wholesome comfort food option. They are manufactured in facilities free from corn and nuts, catering to specific dietary needs. Always refer to the packaging for the most accurate and up-to-date nutritional details, as formulations can change.
Cost and Package Size (Costco)
As of December 4th, 2025, and continuing into January 2026, Kasias Potato & Cheese Pierogi are readily available at Costco warehouses. The current cost is $12.47 for a purchase of three individual packages. Each package contains 14 ounces (approximately 397 grams) of frozen pierogi, offering a substantial quantity for families or those who enjoy frequent indulgence.

This bulk purchase provides excellent value, making Kasias Pierogi an economical choice compared to smaller, individually sold packages. Costco’s offering ensures a consistent supply of this popular Polish comfort food, simplifying meal planning and satisfying cravings.
Recent Updates & News (January 2026)
As of January 27th, 2026, several noteworthy updates are impacting the gaming and development spheres, alongside continued Kasias Pierogi popularity. Roblox Studio has seen significant beta updates, including Occlusion Culling (November 2024) and Input 2.0 enablement (May 2025), enhancing game performance and user experience.
Furthermore, Roblox launched servers in Brazil (May 2025), expanding its global reach. Age-check requirements for chat are rolling out globally (January 2026), prioritizing user safety. Separately, SuperbulletAI, an AI assistant for Roblox game development, launched in August 2025, offering 1M free tokens monthly. These developments demonstrate Roblox’s commitment to innovation and community.
Roblox Studio Beta Updates (May 2025)
May 2025 marked a period of substantial advancement for Roblox Studio, primarily focused on enhancing developer capabilities and game performance. A key release was the introduction of Input 2.0, designed to provide more control and flexibility over player input methods. Enabling this beta involved navigating to the File menu within Roblox Studio, offering creators a streamlined process for adoption.
Simultaneously, Occlusion Culling debuted in Studio Beta, a crucial optimization technique that significantly improves rendering efficiency by preventing the display of obscured objects. These updates collectively aim to empower developers to create more immersive and optimized experiences, benefiting both creators and players alike.
Brazil Server Launch (May 2025)
Responding to significant player demand, Roblox announced the launch of servers located in São Paulo, Brazil, in May 2025. This strategic expansion aimed to dramatically improve connectivity and reduce latency for players within Brazil, offering a smoother and more responsive gaming experience. The move signified Roblox’s commitment to global accessibility and catering to its diverse international user base.
The Brazil server launch was highly anticipated, promising faster load times and more stable gameplay for a substantial portion of the Roblox community. This initiative underscores Roblox’s dedication to providing an optimal platform for both game creation and enjoyment worldwide.